

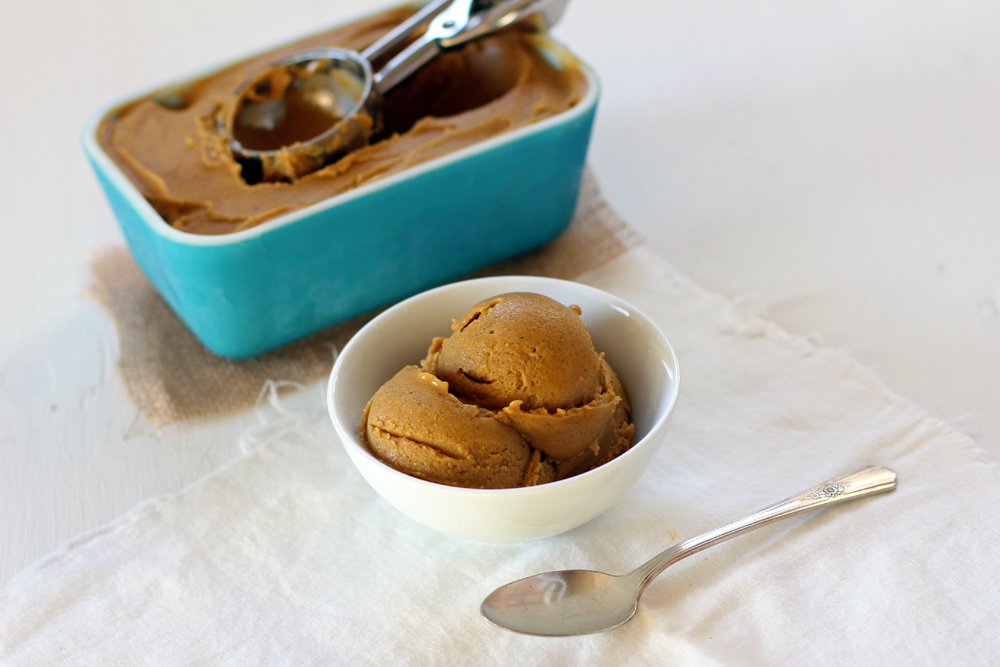
Paleo Pumpkin Pie Ice Cream
coconut milk & butternut squash dairy-free ice cream with a pumpkin spice bite
I grew up in the Pennsylvania Dutch region where butternut squash grow to the size of swan necks. I use butternut squash in place of pumpkin in any recipe that calls for pumpkin, unless its a savory dish. Butternut squash tastes superior to me than the popular sugar pie pumpkin that everyone else uses. In Pennsylvania Dutch country, they too use butternut squash in place of pumpkin, which explains why I grew up eating butternut squash in all of my childhood pumpkin pies. I have tried sugar pie pumpkin in a few of my pumpkin recipes and I wasn’t satisfied with the results. In my archerfriendly book, they’re only good for decoration. When you don’t use a lot of sweetener, you need a really strong “pumpkin-y” flavor with natural sweetness, which is why butternut squash does the best job.
The first year I made coconut milk based ice cream, it turned out rock hard. By the time it was scoopable, it didn’t hold its form and quickly melted on my plate. After three years, two extra ingredients, and one additional procedure, I have at last made a professional quality ice cream. Adding guar gum and coconut cream, while also heating the ice cream mixture on the stove, make this alternative ice cream work. And it works well.
The heating idea didn’t come until I read about “normal” person ice cream making in my undergrad food science book, “Understanding Food” by Amy Brown. Heating the ice cream mixture helps to improve the “texture and body” of the ice cream. Chilling the ice cream following the heat is known as aging. This process solidifies the fat and swells the gelatin, increasing the viscosity of the final ice cream product. The aging process lends a “smoother texture, improved body, and resistance to melting.” That’s exactly what the aging process did for my coconut milk based pumpkin pie ice cream.
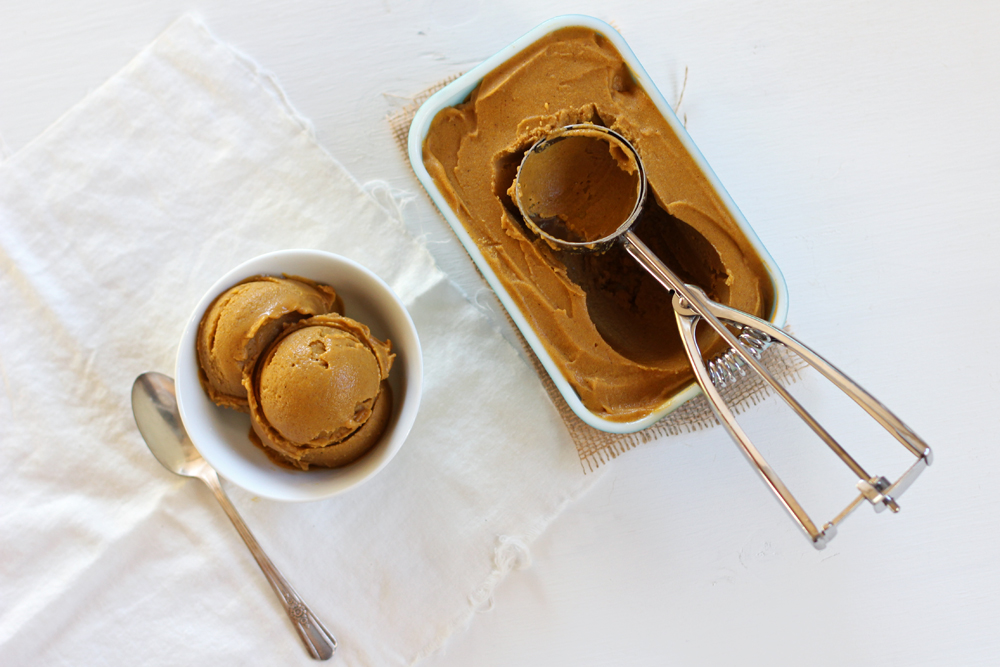
 Paleo Pumpkin Pie Ice Cream
Makes 1 QuartIngredients
- 1 cup cooked & pureed butternut squash
- 2.5 cups full fat coconut milk
- 1/4 cup coconut cream
- 1/4 cup honey
- 2 tsp vanilla
- 2 teaspoons unflavored gelatin powder (do not use cold water soluble gelatin)
- 1 1/4 tsp ground cinnamon
- 1 tsp ground ginger
- 1/4 tsp ground allspice
- 1/4 tsp ground cloves.
- tiny pinch freshly grated nutmeg
- 1/8 tsp stevia extract (powder form)
- Place the freezer bowl from your ice cream maker in the freezer, preferably several days ahead of time. Freezing times vary according to manufacturers, so check your manual.
- Mix all ingredients together in a blender.
- Pour the ice cream mixture into a sauce pan. Cook on medium to low heat for 30 minutes, stirring regularly. It’s OK if it bubbles a little bit, but try to ensure it doesn’t boil.
- Refrigerate overnight (or for at least 6 hours).
- Ice cream mixture is now ready for your ice cream maker. Follow the manufacturer’s directions for your specific equipment.
Notes:
- Want it sweeter? If you add more honey, decrease the coconut milk by the same amount of honey you increase. The proportions in this recipe are exact, so you need to consider the volume of the final product when increasing anything in the recipe.
- I leave my freezer bowl in my deep freezer 24/7 so it’s always ready to use.
- I use 365 Everyday Value® organic full fat coconut milk (from Whole Foods).
- I have this Cuisinart 2-quart ice cream maker. I churn my coconut ice cream mixtures for about 30 minutes or until it reaches the consistency I want.
- The ice cream scoop looks prettier if you let your ice cream sit out for a few minutes before serving.
- If you don’t have coconut cream, place a can of full fat coconut milk in the fridge for a few hours. The cream will separate — you can use that as the coconut cream for this recipe.


Enjoy More Archerfriendliness
When I packed my school lunch, I was only allowed to have one Tastykake Strawberry Krimpet, instead of the two that came in the package. The same rule applied to the Swiss Rolls. The un-used one ...
Some of people's biggest problems in life can be solved with a human Veggie Chopper. If you had a personal Veggie Chopper, you'd eat your weight in vegetables, right!? That's why you need a ...
I bought a cardboard box of matching dishes for five doll-hairs at a Memorial Day yard sale in Auburn, Pennsylvania, right after my freshmen year at Penn State, and right before I ran away with a ...


Donna S Mathwig
December 1st, 2010 at 8:41 am
Thanks for the inspiration Archer…I’m currently exploring butternut squash, having always been a devoted pumpkin fan! We had a Butternut Bisque on Thanksgiving, and I think I might just try this ice cream!
Reply